Direct Purchase flow
General Odoo docu on purchase flow
https://www.odoo.com/documentation/19.0/applications/inventory_and_mrp/purchase.html
In the Purchase App go to the Menu "Orders"
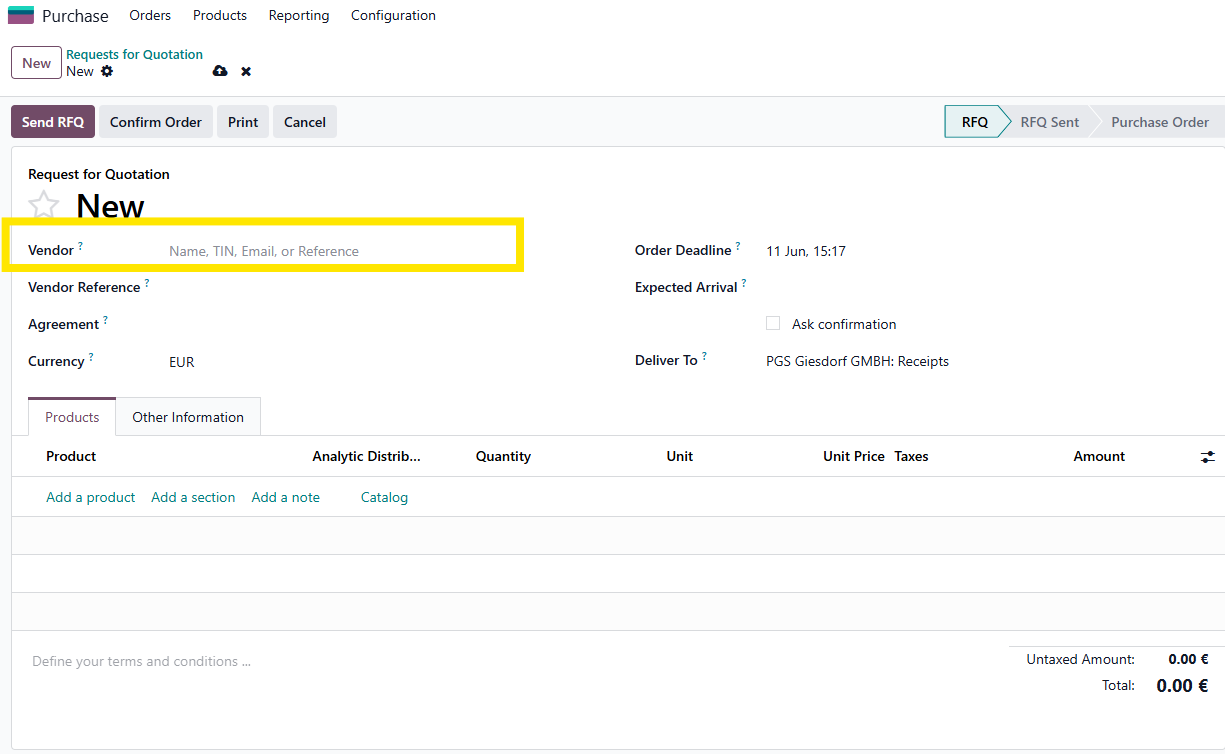
To create a request for quotation, go to either overview, "Request for quotations" or "Purchase Orders"
In both instances, click the button "New" to create a new request for quotation.

Flow via RDB
Create the PO
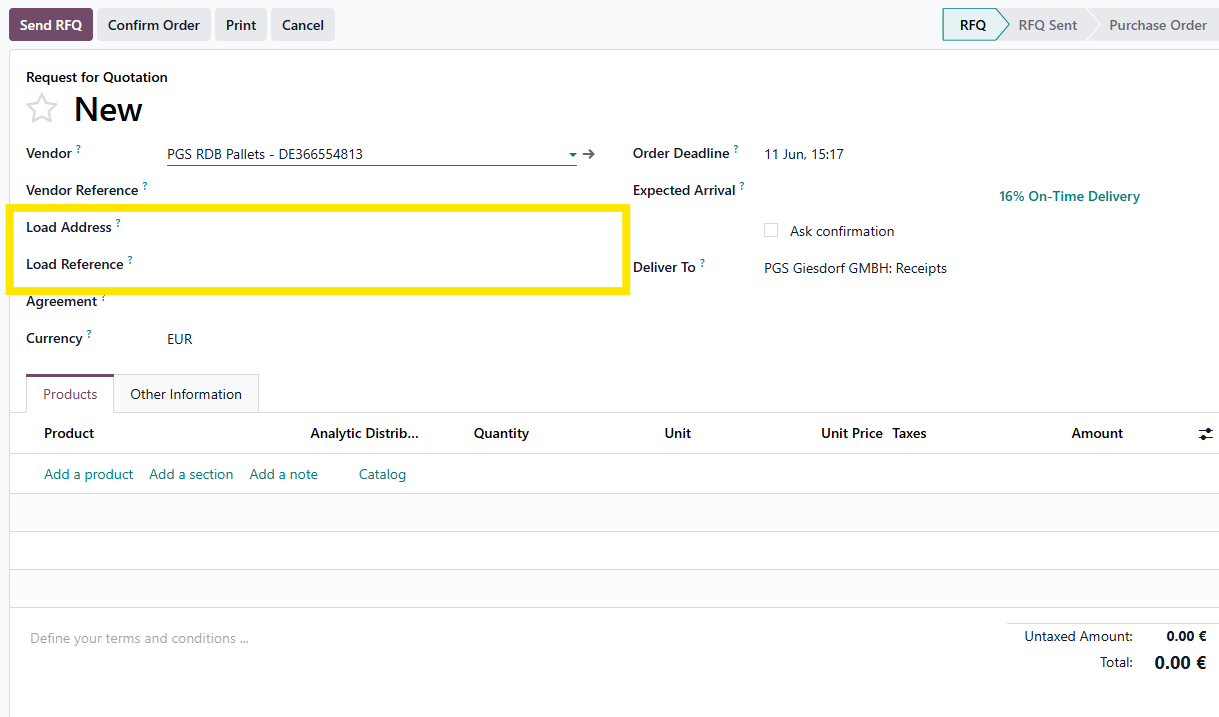
In the purchase order form, select RDB as your vendor
This selection adds 2 extra fields to the form
This is where you select the actual vendor and it's reference
You can add the expected arrival date.
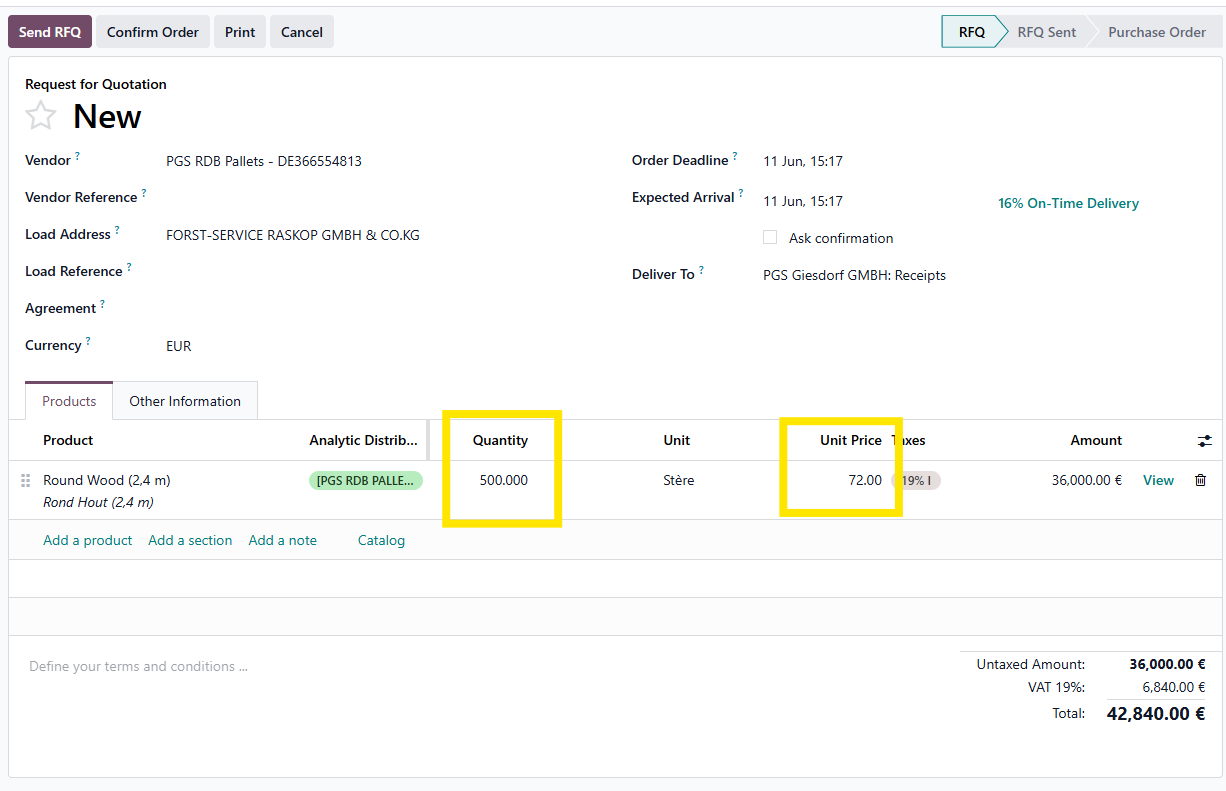
Next you will add the products
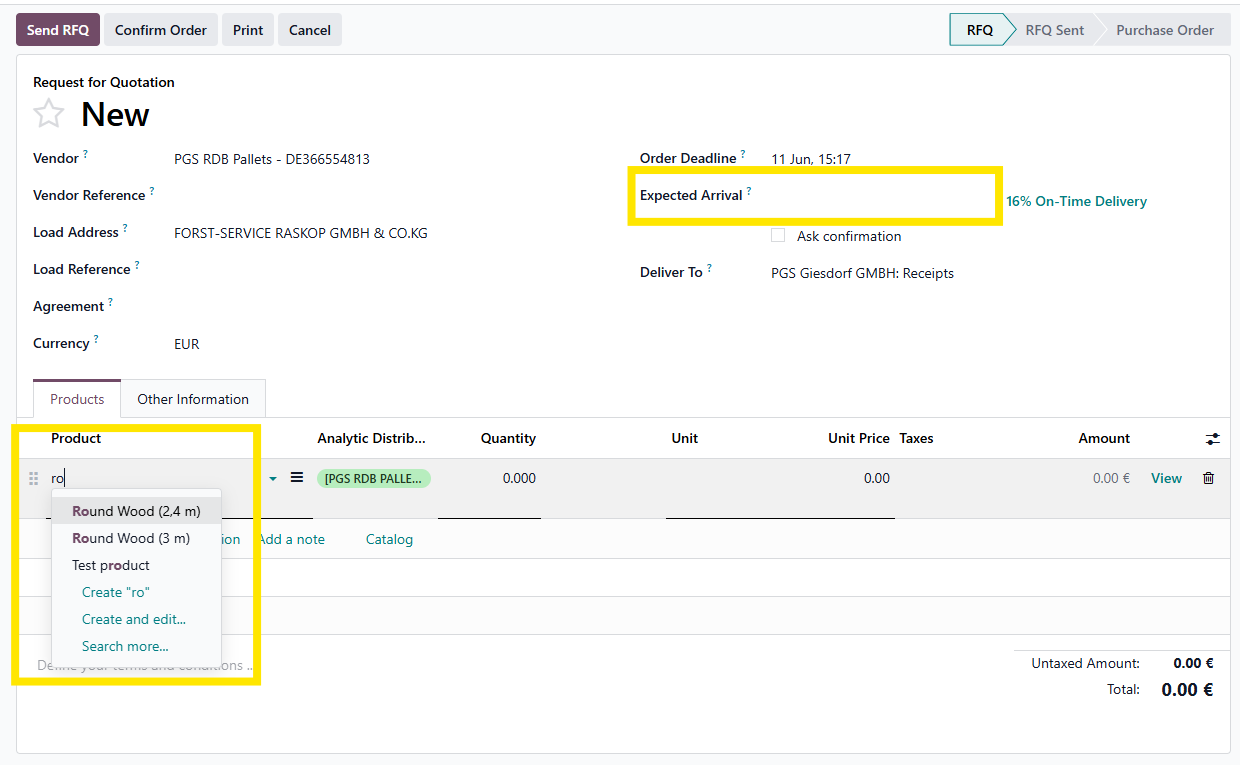
If known, the most important parameters are the quantity and the unit price.
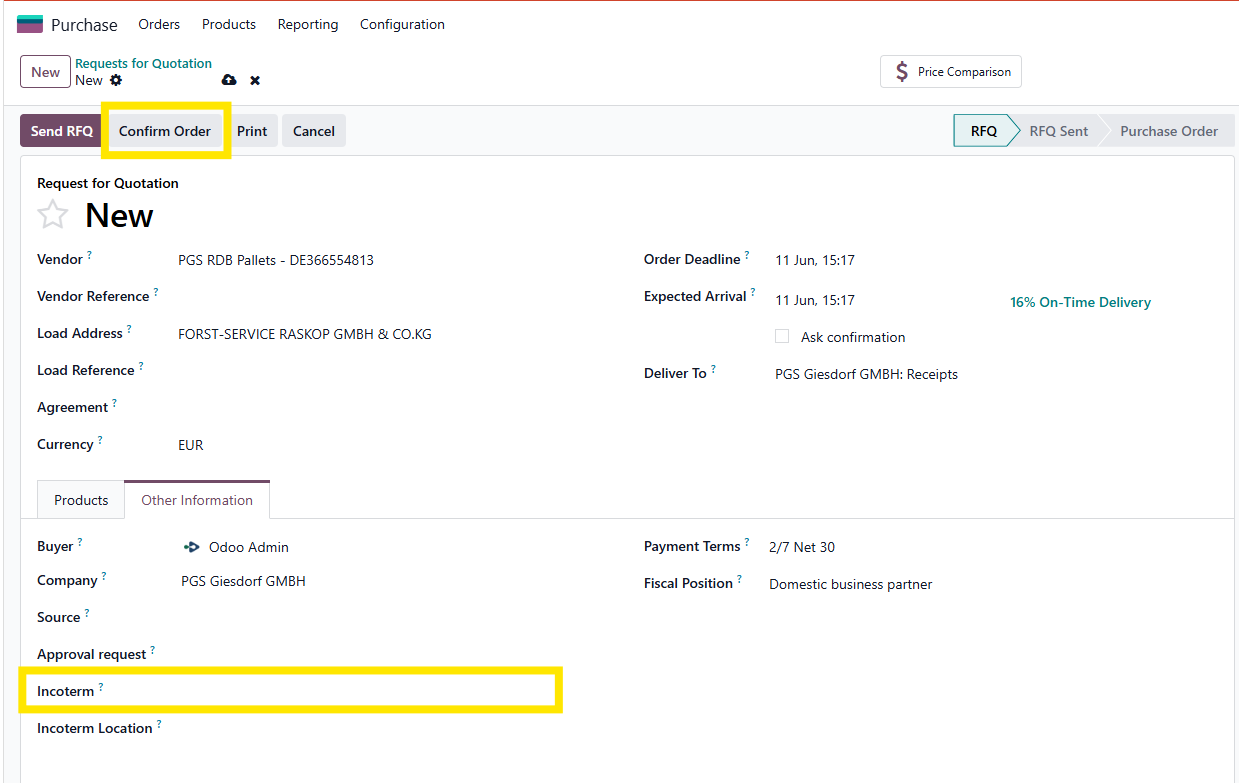
On the other info tab, you can add the Incoterm
If all is registered, you can confirm the order
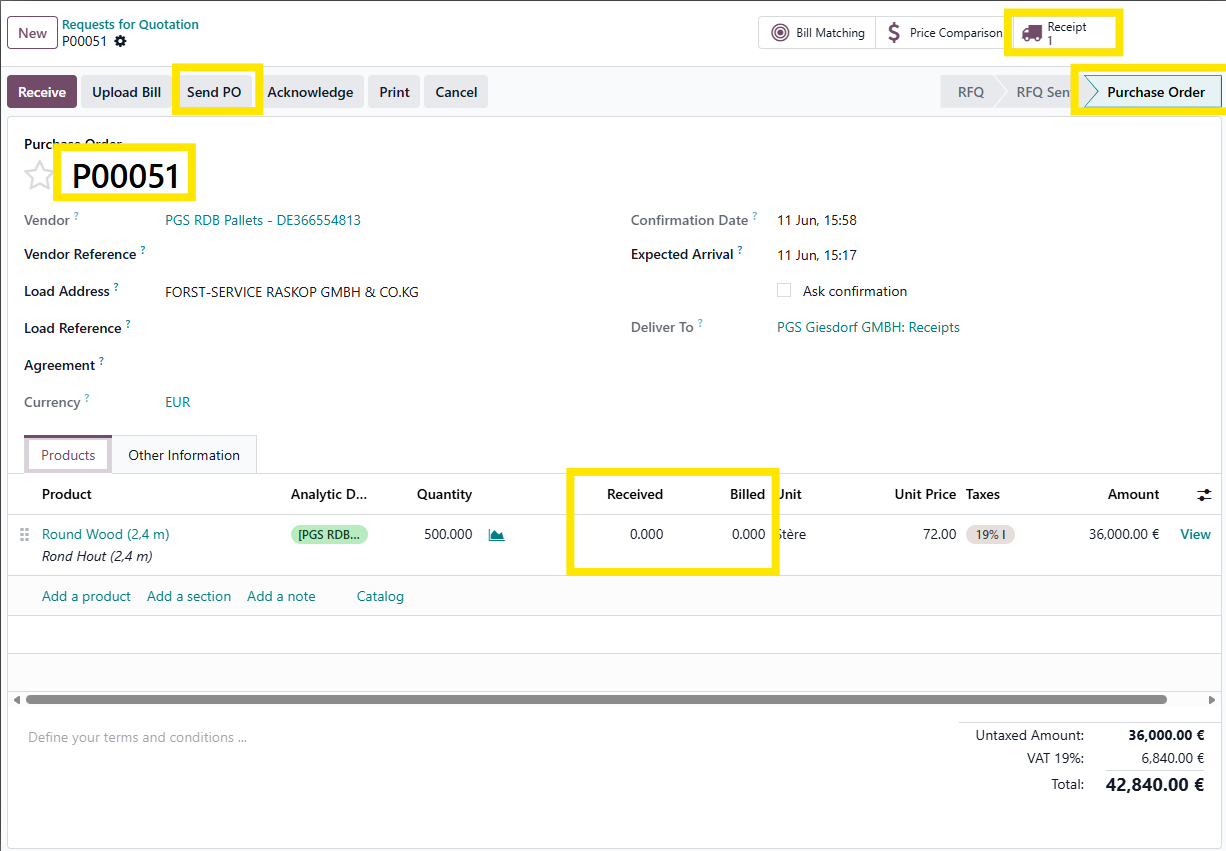
The status is changed to 'Purchase Order'
The PO receives a code/number
A receipt record is created.
The quantity is extended with the number of goods received and the number of goods changed.
You can send the PO to RDB. They will in turn, create a PO for the vendor marked in the 'Load Address"
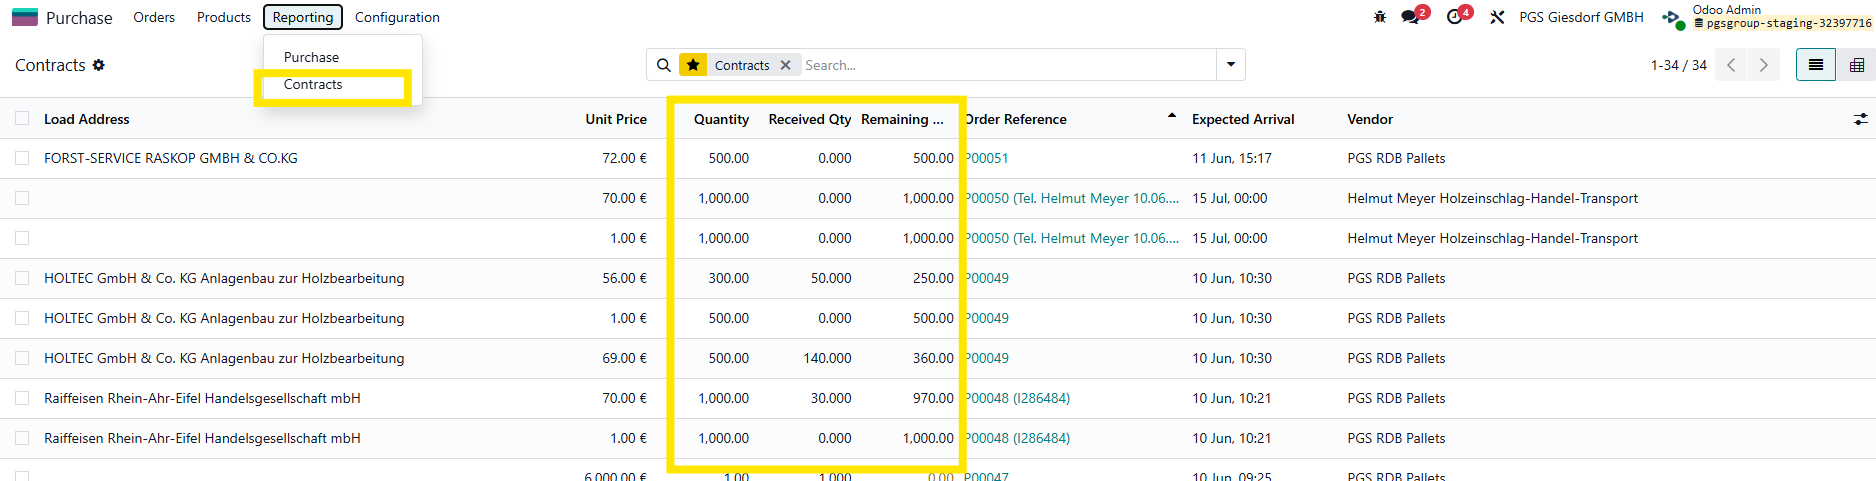
Follow up of the quantities left on the PO are checked in the Contracts overview.
You can send the PO to RDB. They will in turn, create a PO for the vendor marked in the 'Load Address"
Register reception
When shipments come in, we can register these from the Inventory app of the Purchase app.
From the PO, you can click the Receive button or the Receipt smart button.
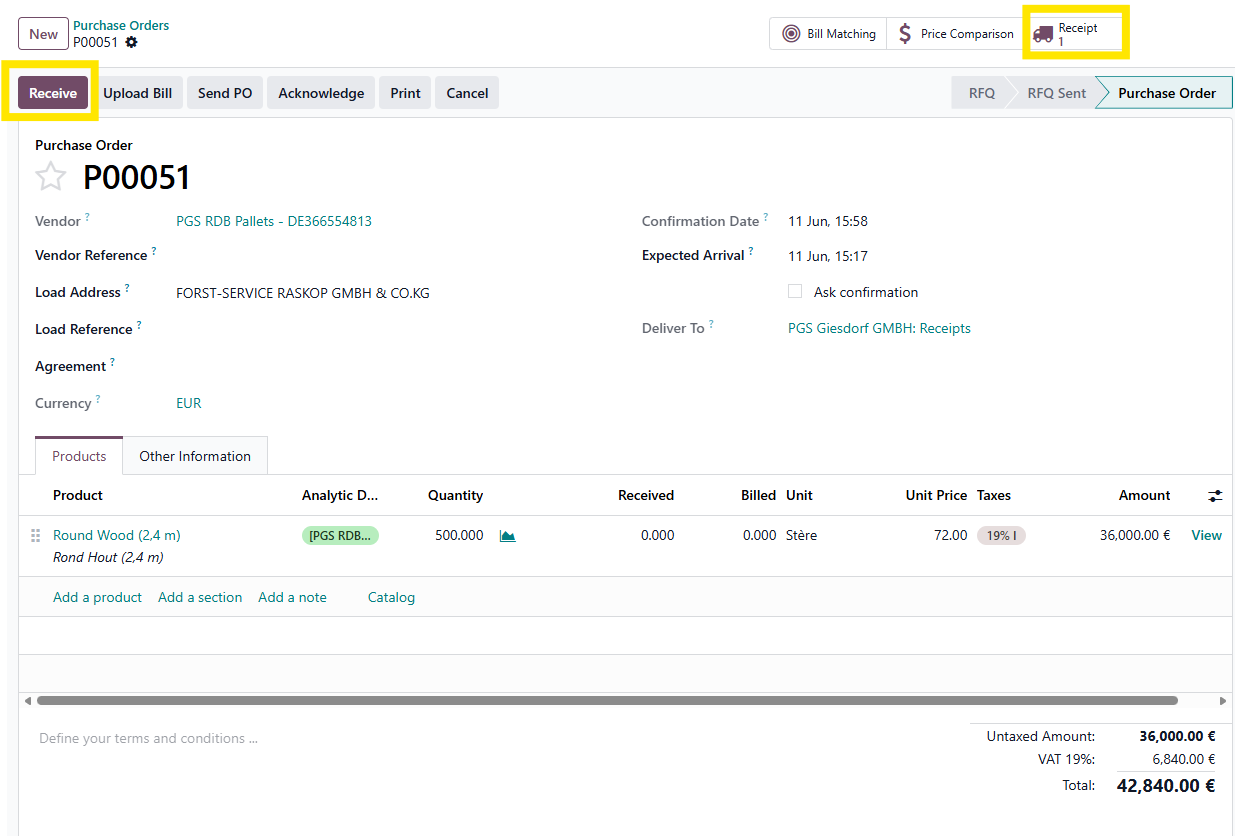
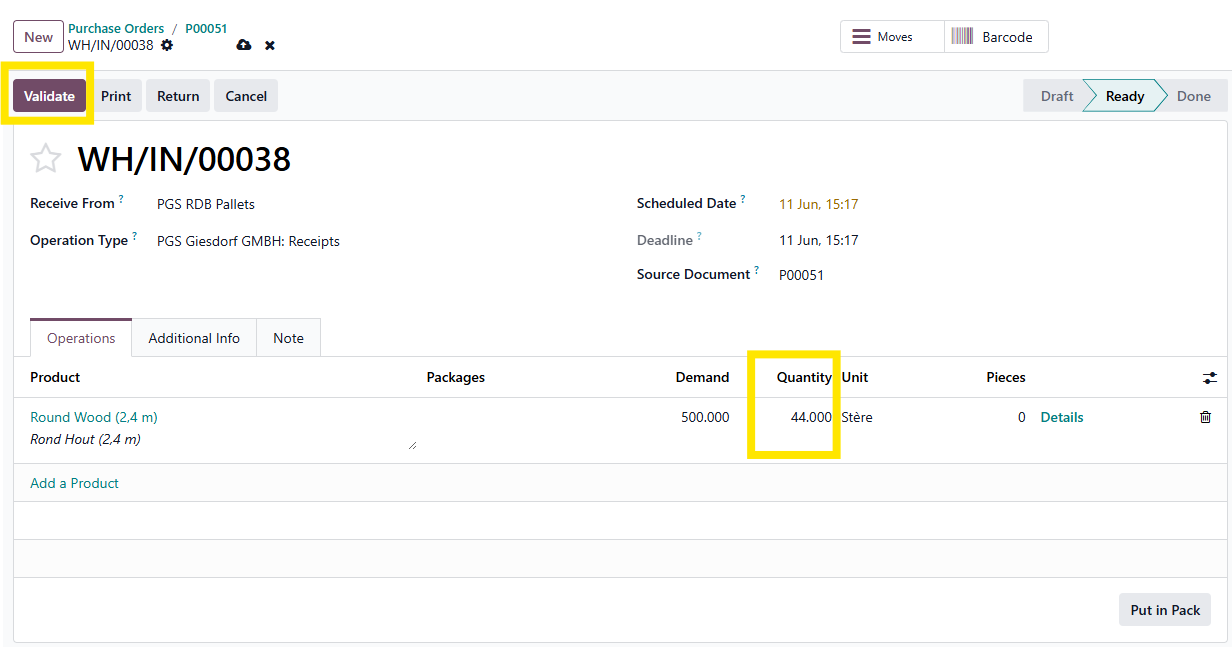
The receipt screen opens and by default, the quantity is set to the quantity indicated on the purchase order.
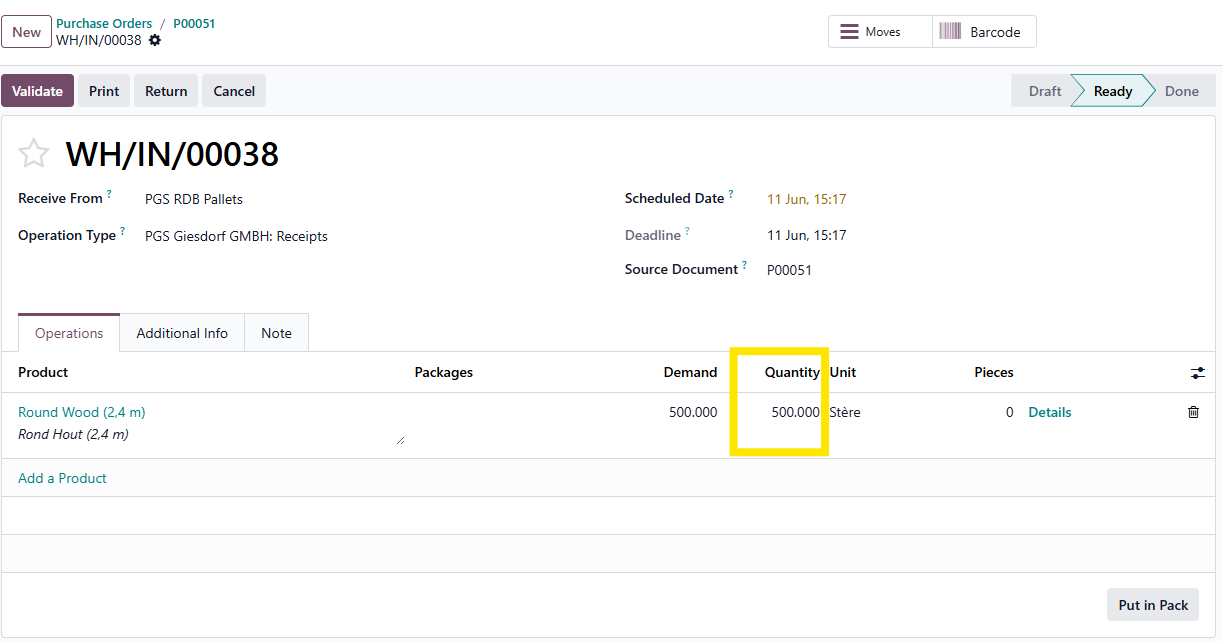
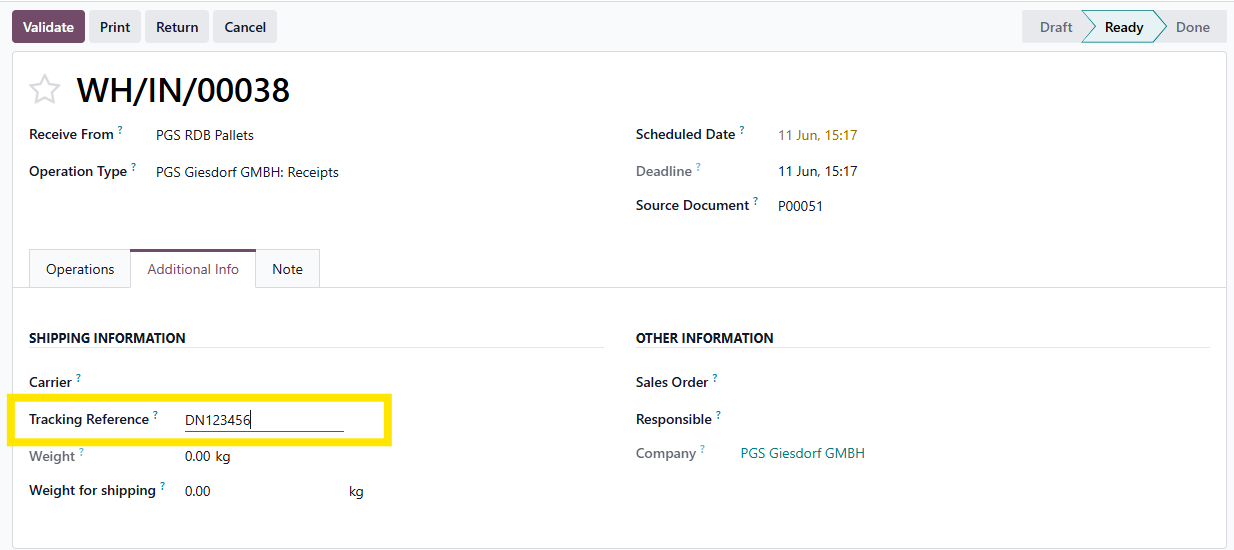
This needs to be changed to the correct quantity that has been received. In the 'Additonal Info' tab, we can register the delivery note number form the supplier. Any remarks, can be noted in the 'Note' tab.
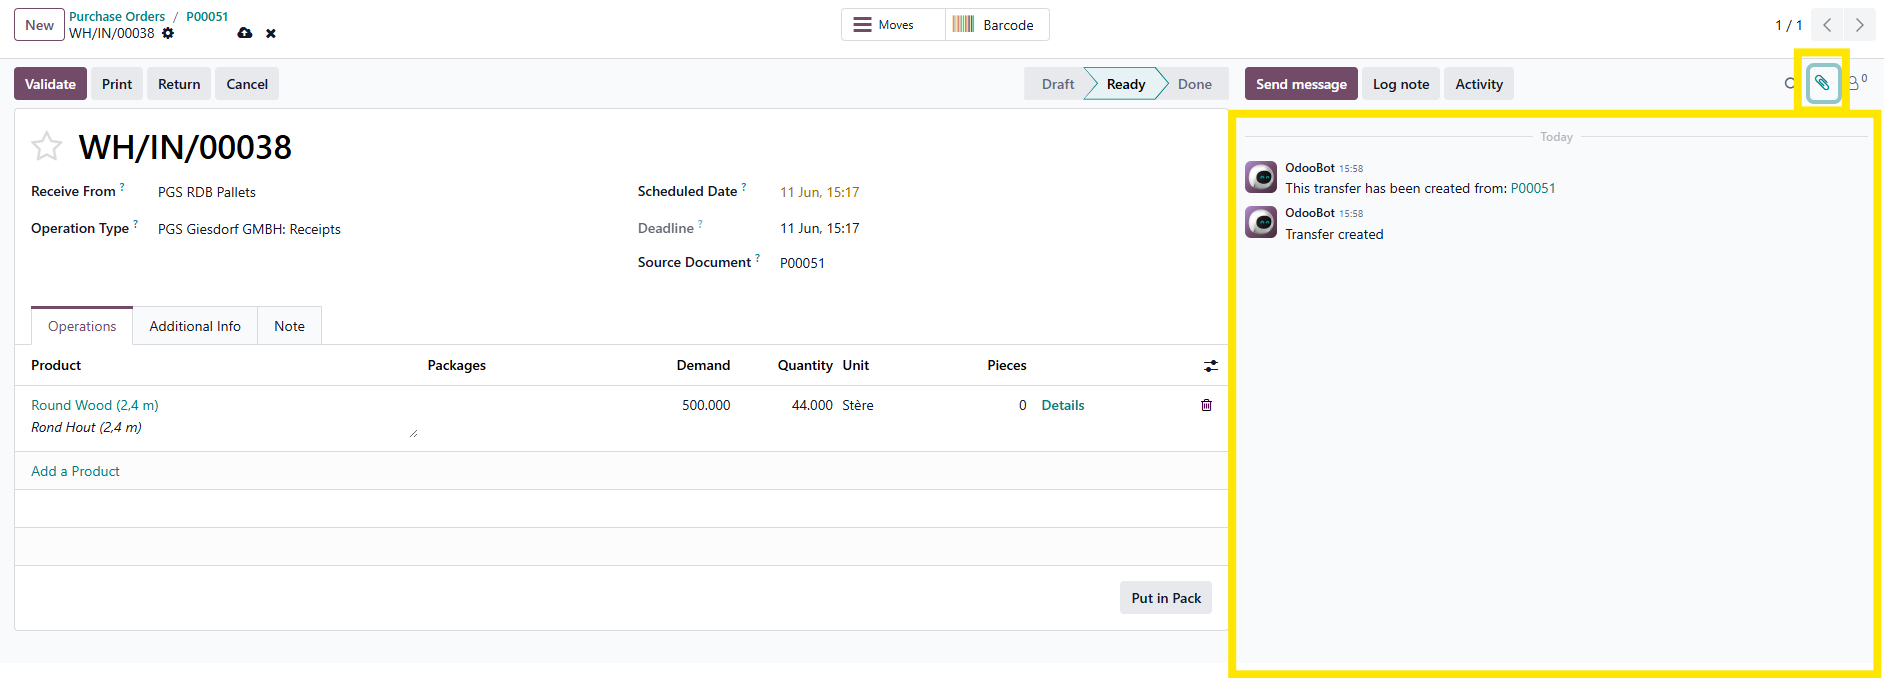
The delivery note from the vendor can be added by dragging it in the 'big yellow area' also known as the chatter.
Alternatively, you can open a file upload screen, by clicking the paperclip icon.
When everything is indicated, the 'Validate' button can be clicked.
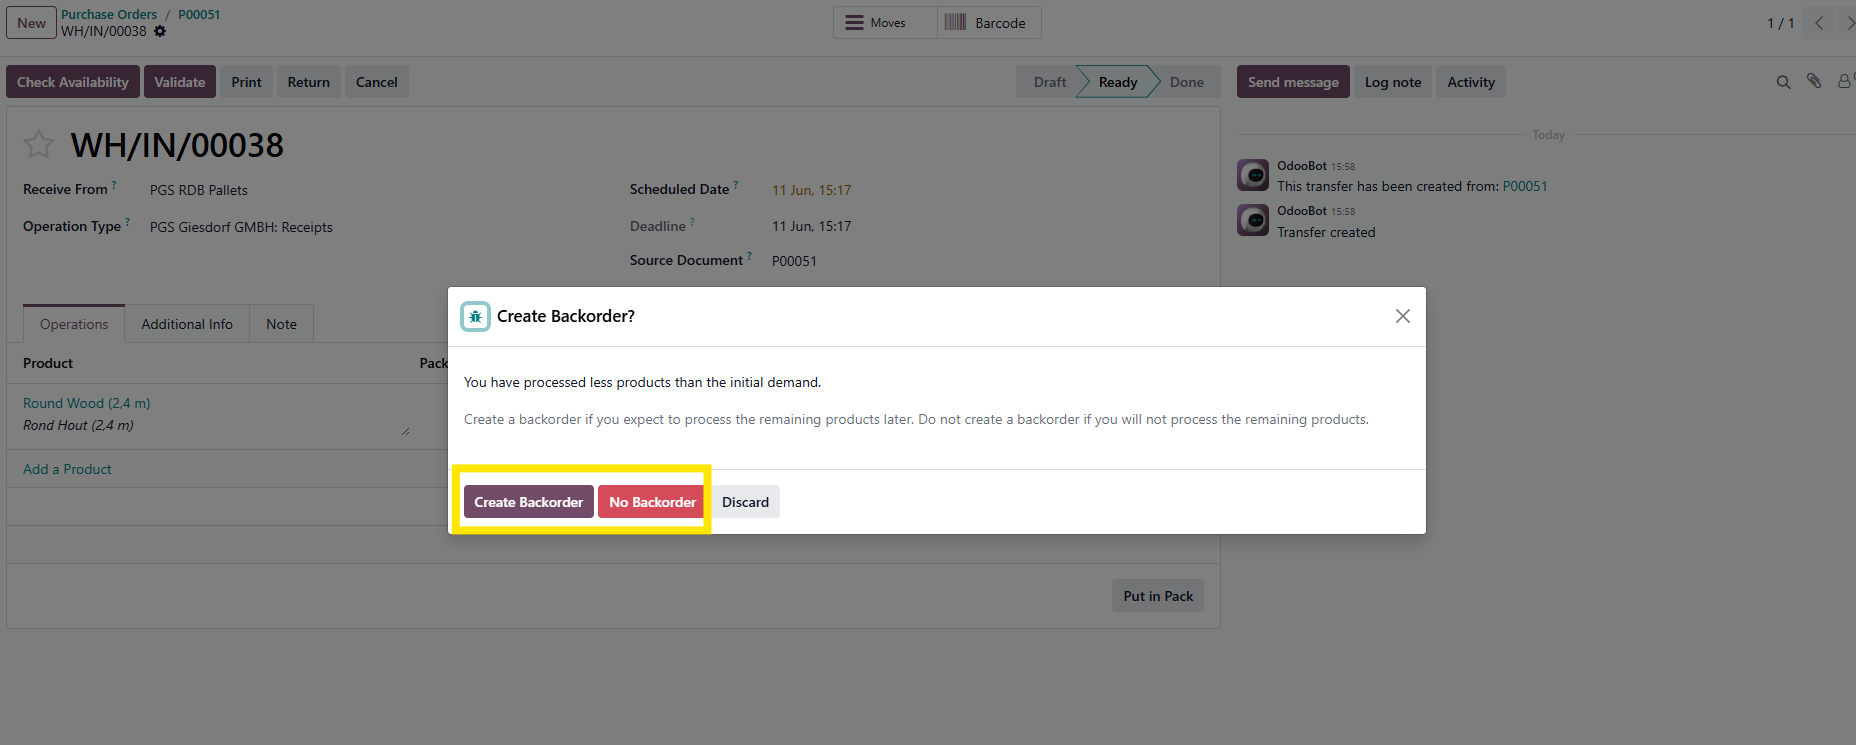
When not all goods have been delivered, Odoo asks to create a backorder for the remainder.
If more deliveries are expected for the PO, select to create a backorder. If no backorder, the PO will be considered as being fully delivered.
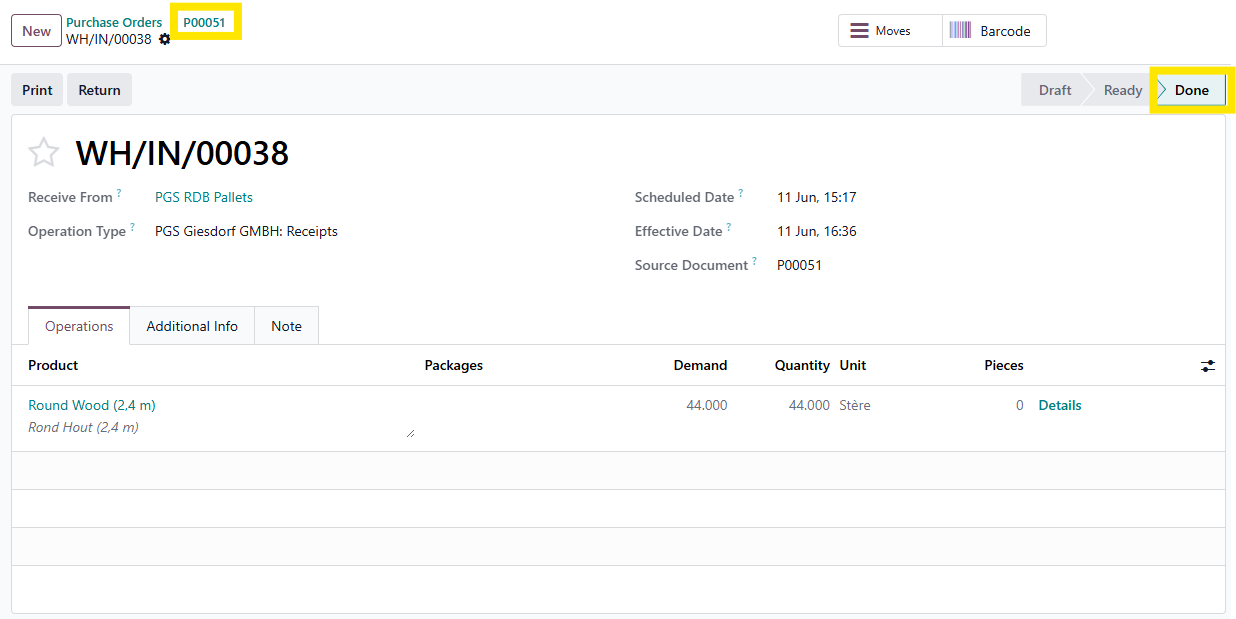
The reception is now marked as 'Done'. If needed, a return to the PO via the breadcrumb in the top left, is always possible.
Handle the vendor bill
Vendor bills are imported into the system by E-invoicing or by sending to a dedicated mailbox.
Through the OCR, data is read out and the fields are filled in as a draft proposal.
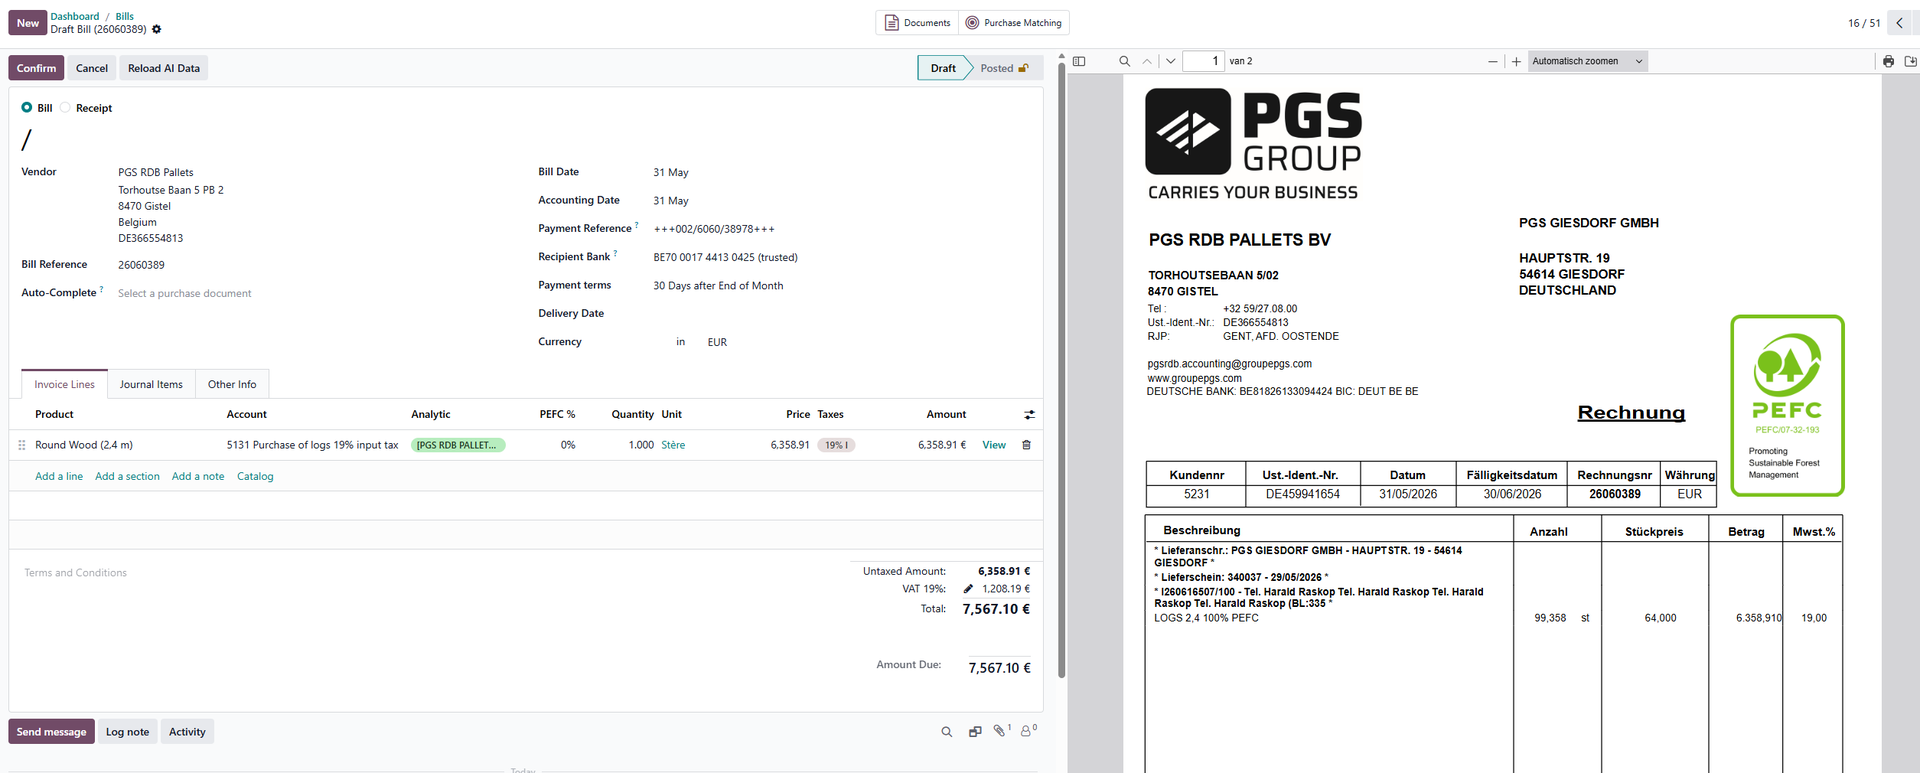
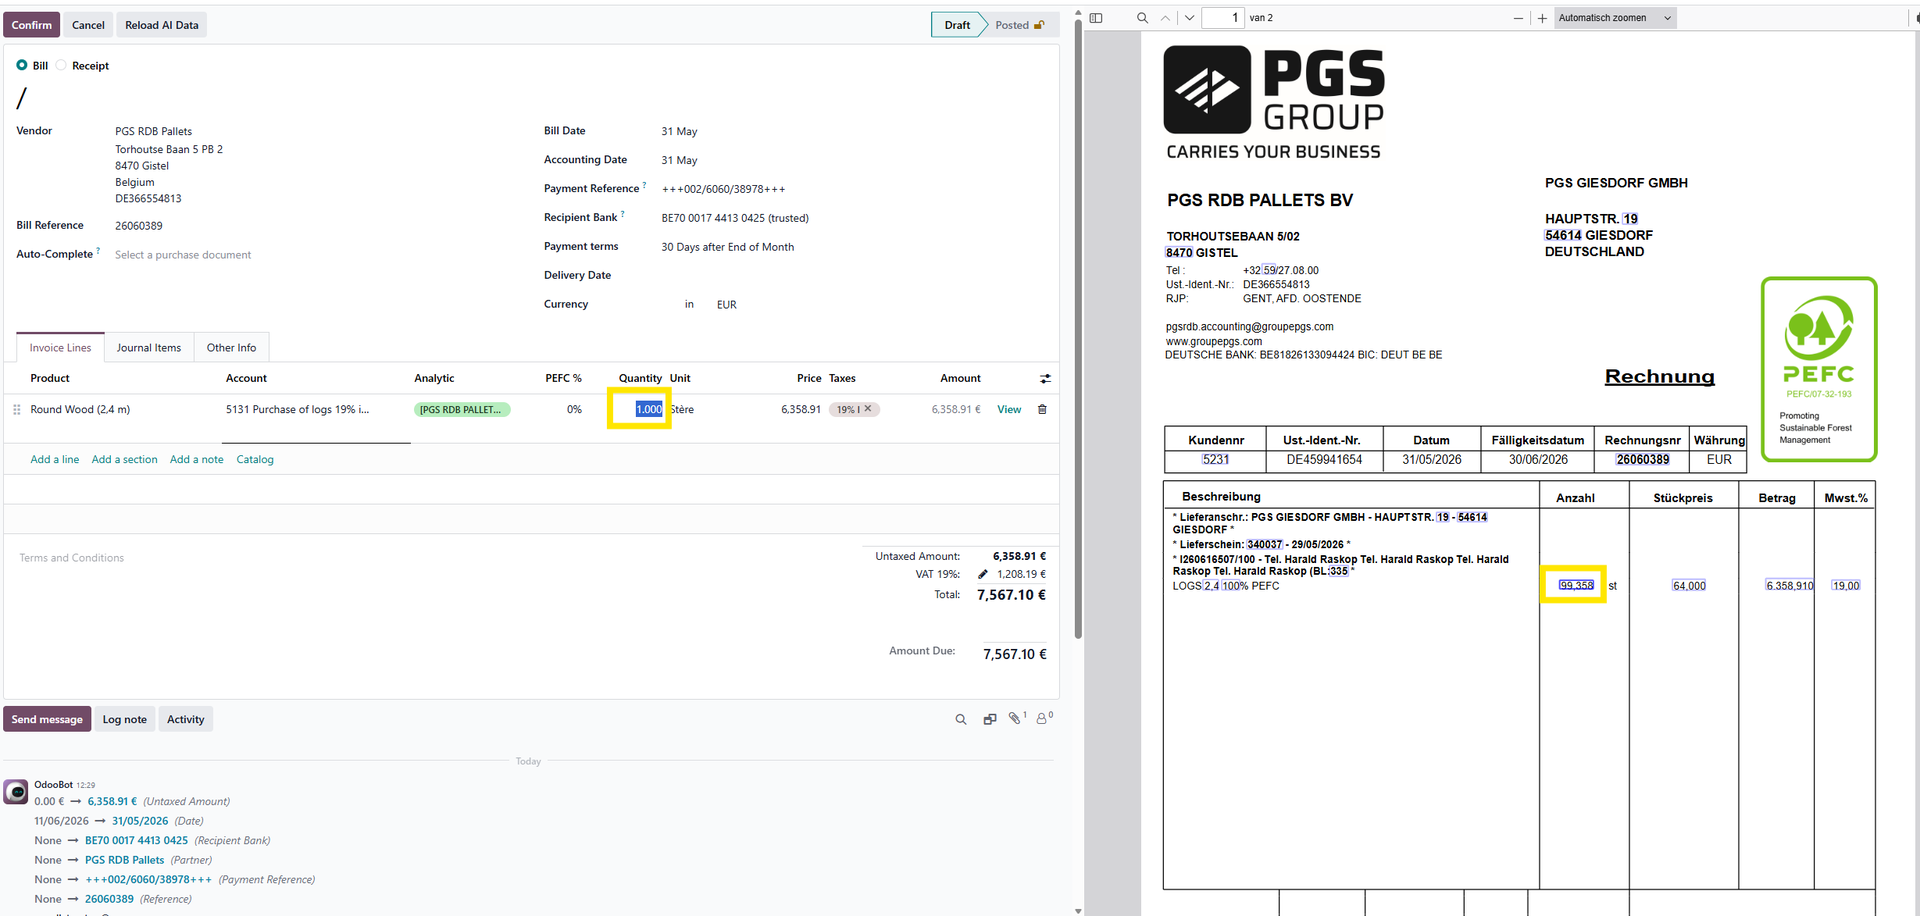
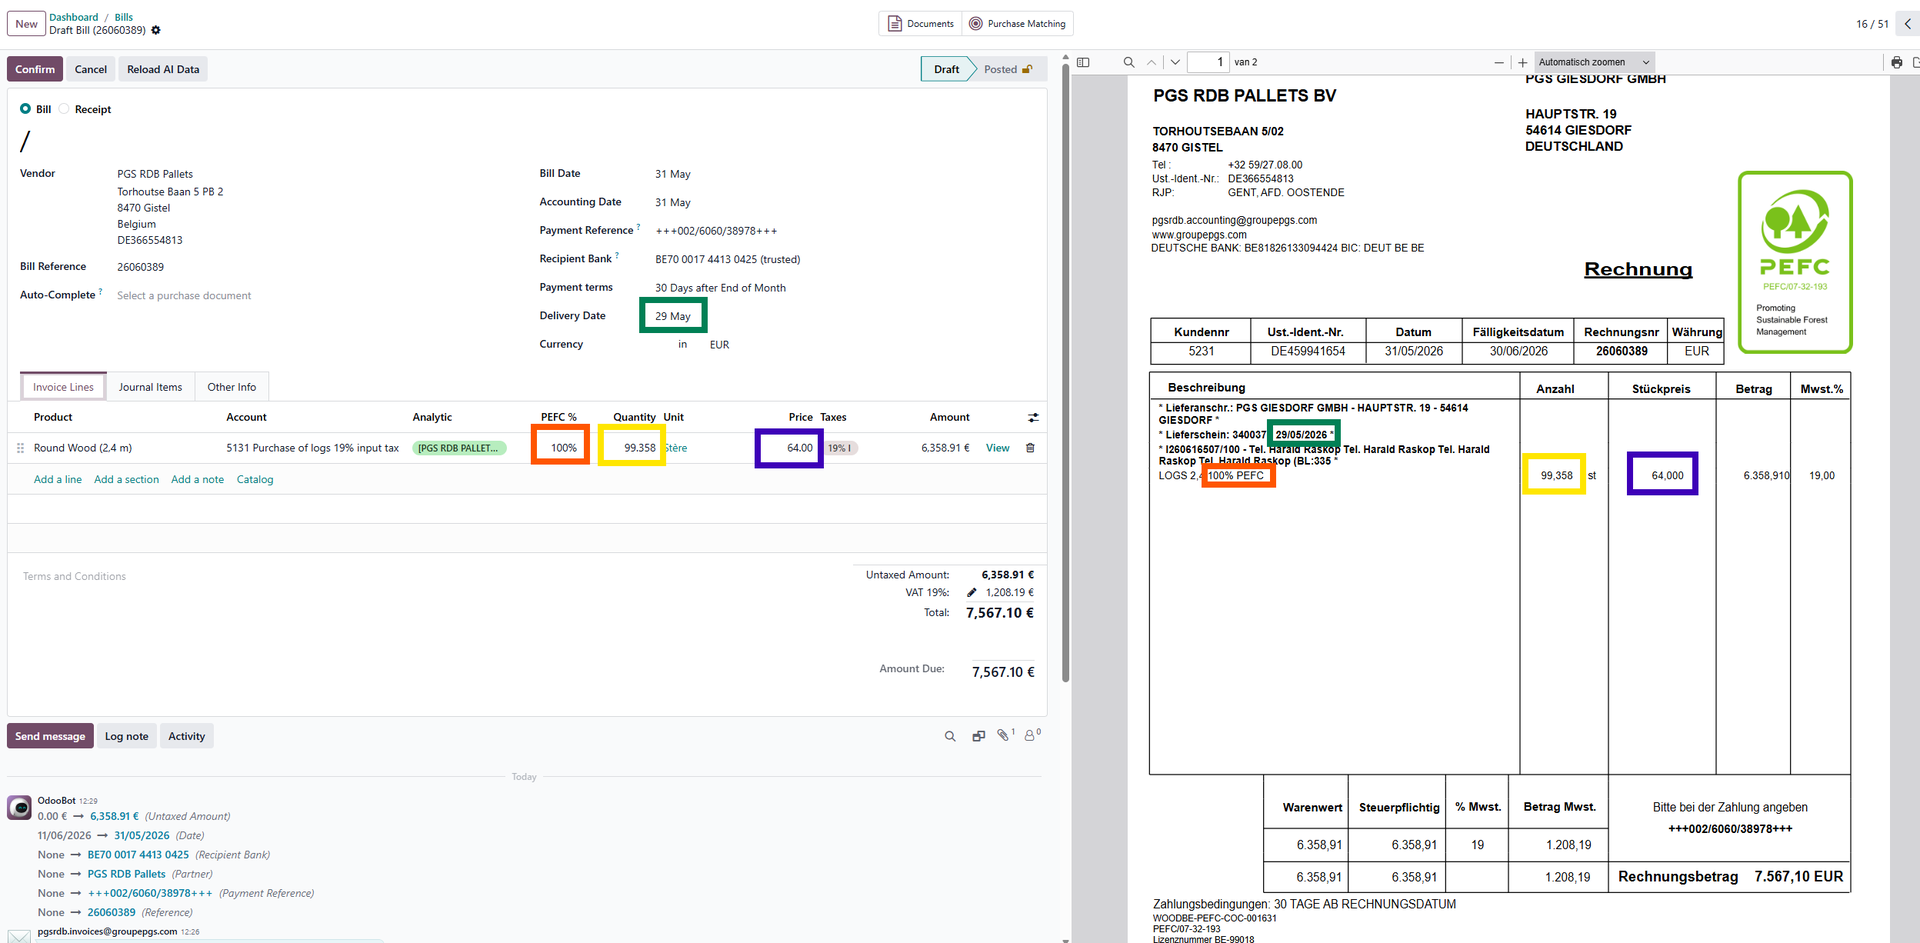
First action is to correct the values that have not been read out correctly.
This can be done by overwriting the values manually or by clicking on the value and afterwards on the value in the invoice document.
When all corrections and additions have been made, you can match the vendor bill with the PO.
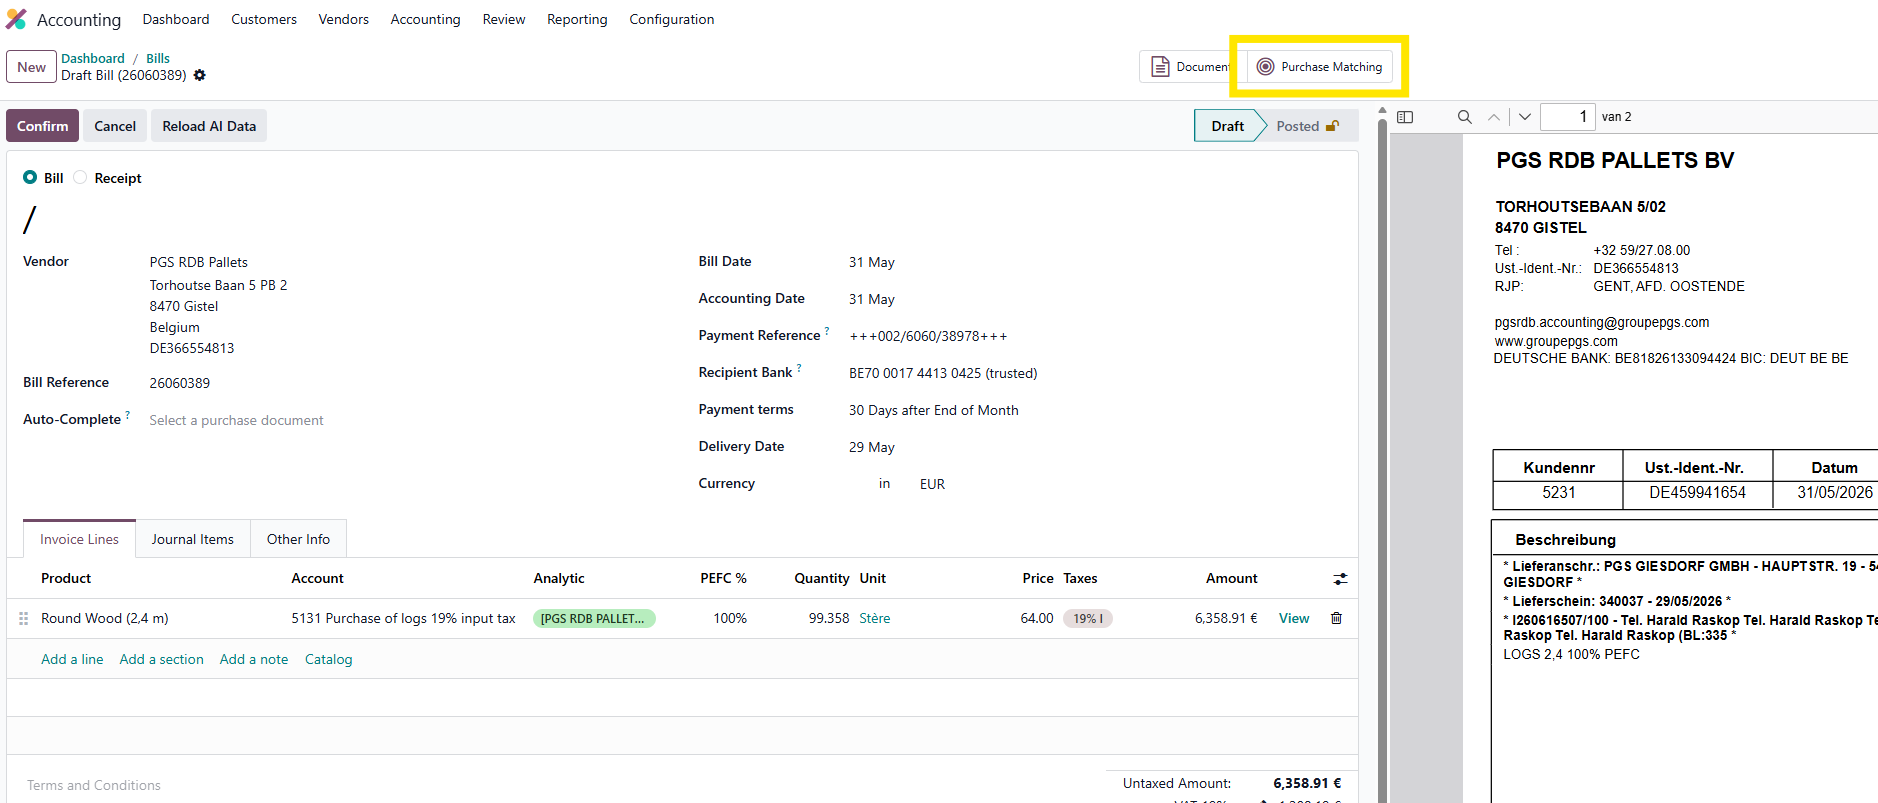
When clicking the Purchase matching button, it will provide a list with the bill and all open PO's from the same vendor.
The user needs to select the bill and matching PO via the checkbox in the first column.

When the items to match have been selected, click the match button.

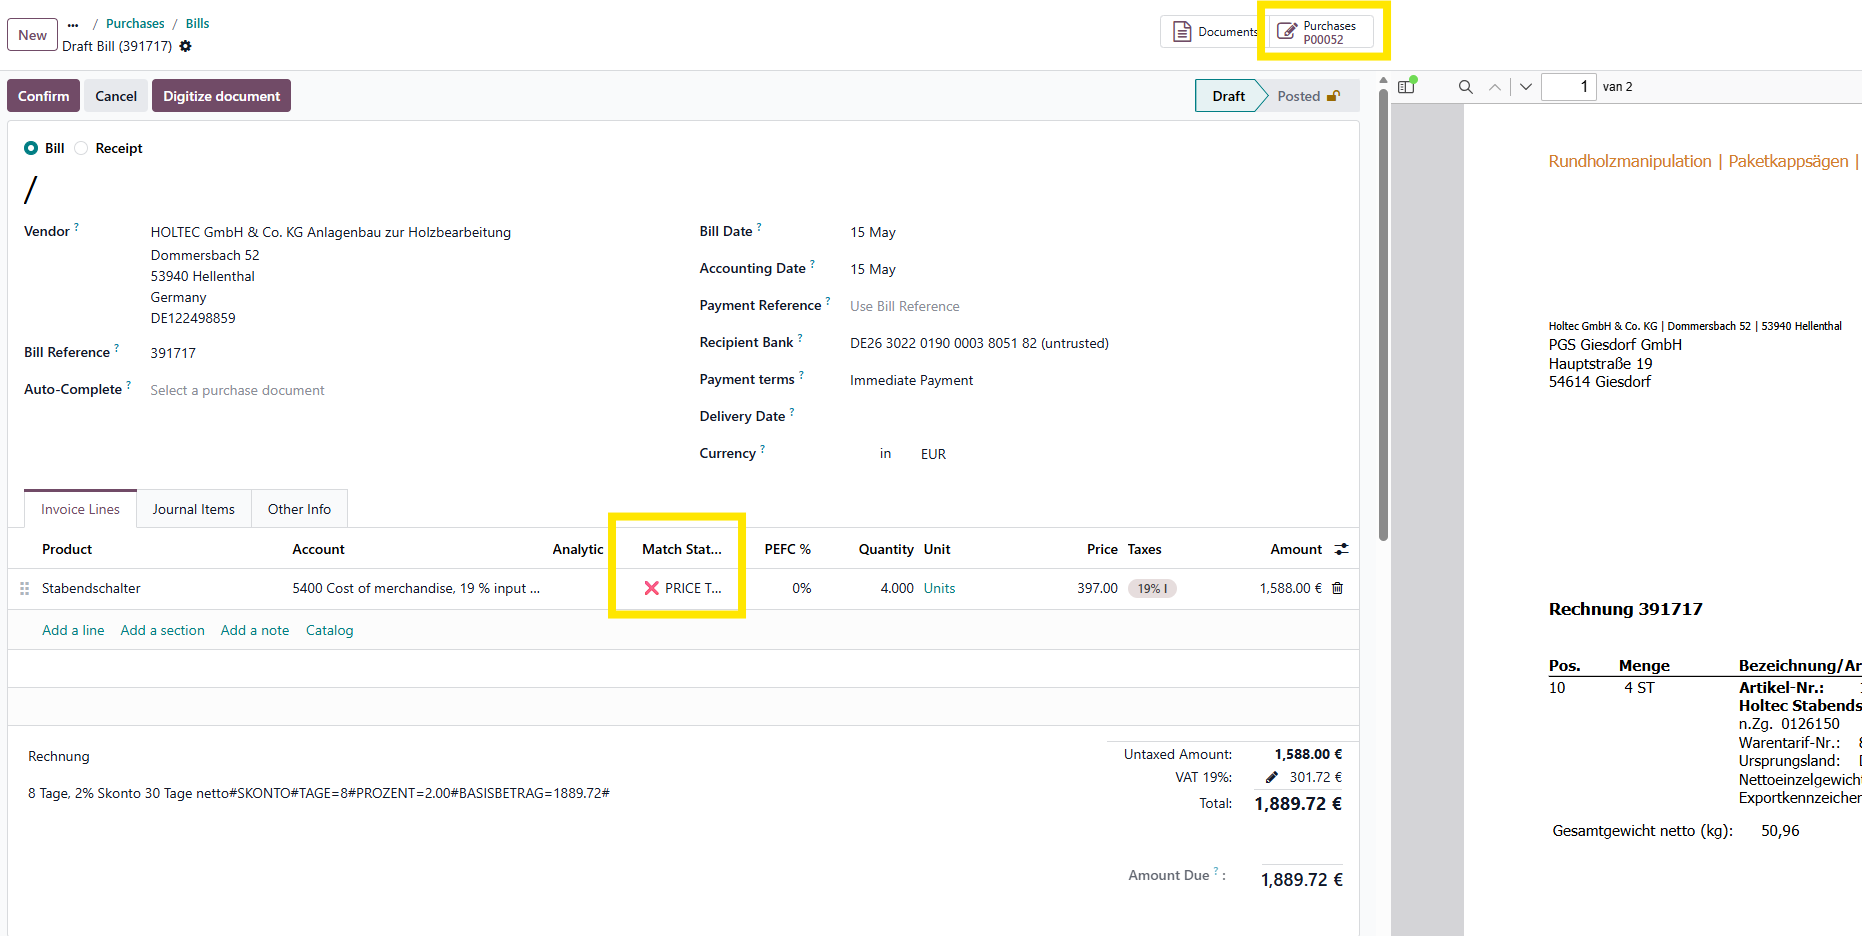
When the matching is done, the 'Purchase matching' smart button is replaced by the smart button to the PO.
When the unit price or quantity deviates from the PO on an invoice line, this is indicated.
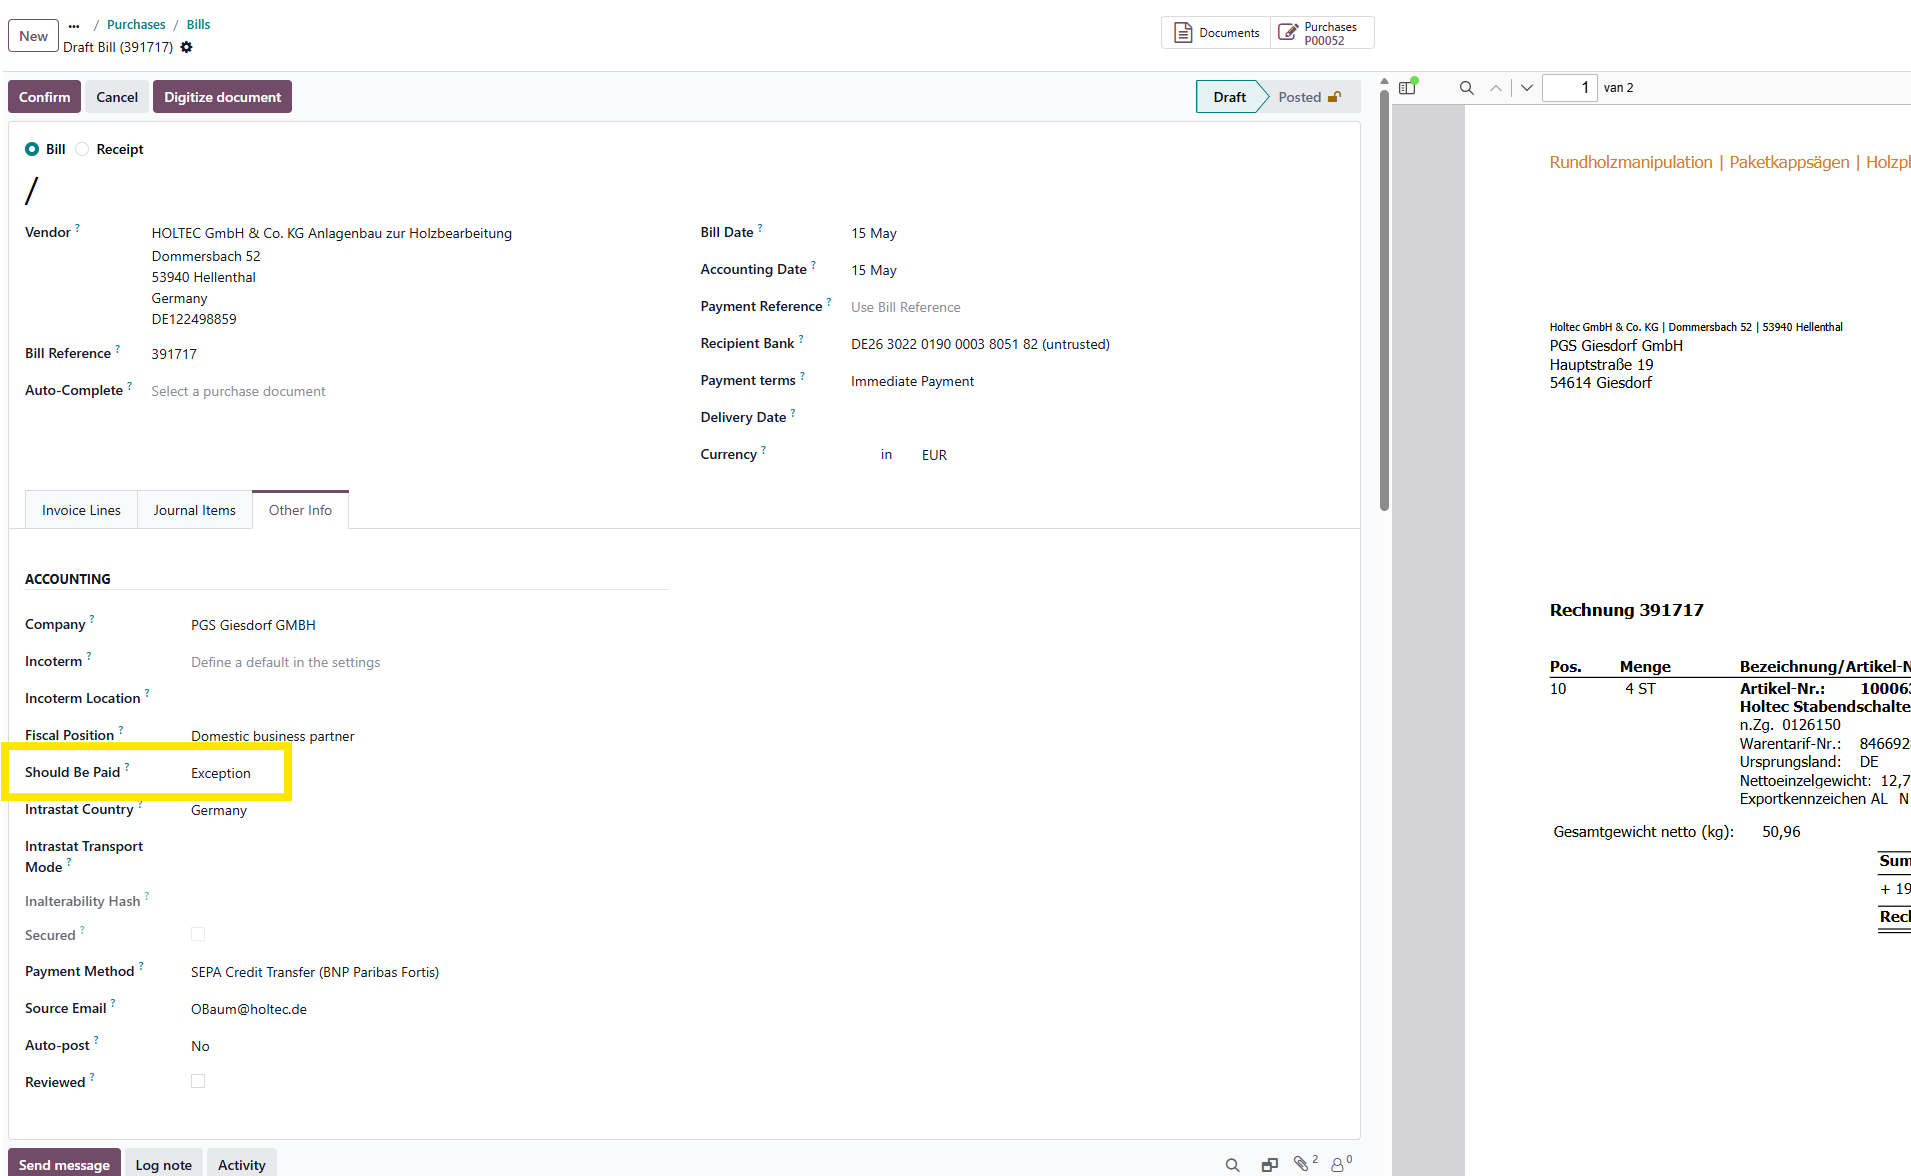
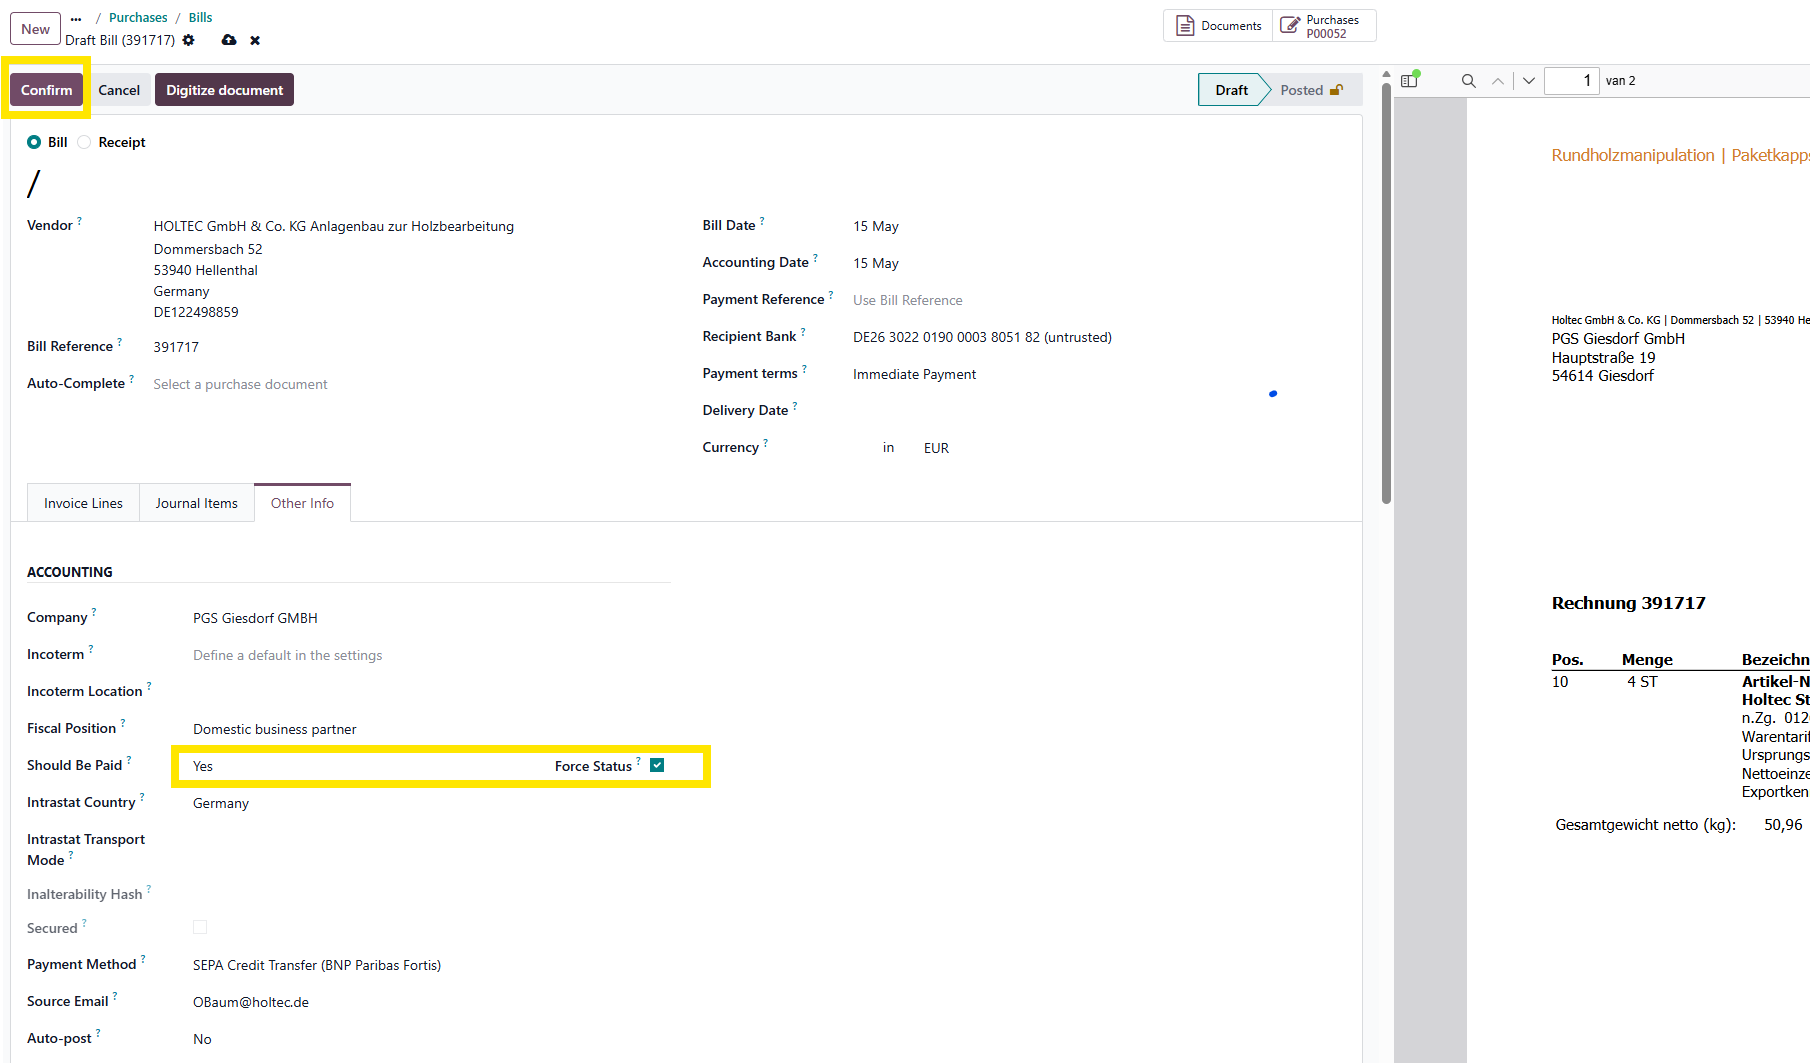
On the Other info tab, it should be indicated if the invoice 'Should be paid'.
If the matching is without deviations, it will be marked 'Yes' automatically
In other cases, as a safety, it marks 'Exception'.
The user needs to indicate the correct action to be done after verification of the deviation.
It is marked, when the user has manually changed the status via the 'Force Status' checkbox being checked.
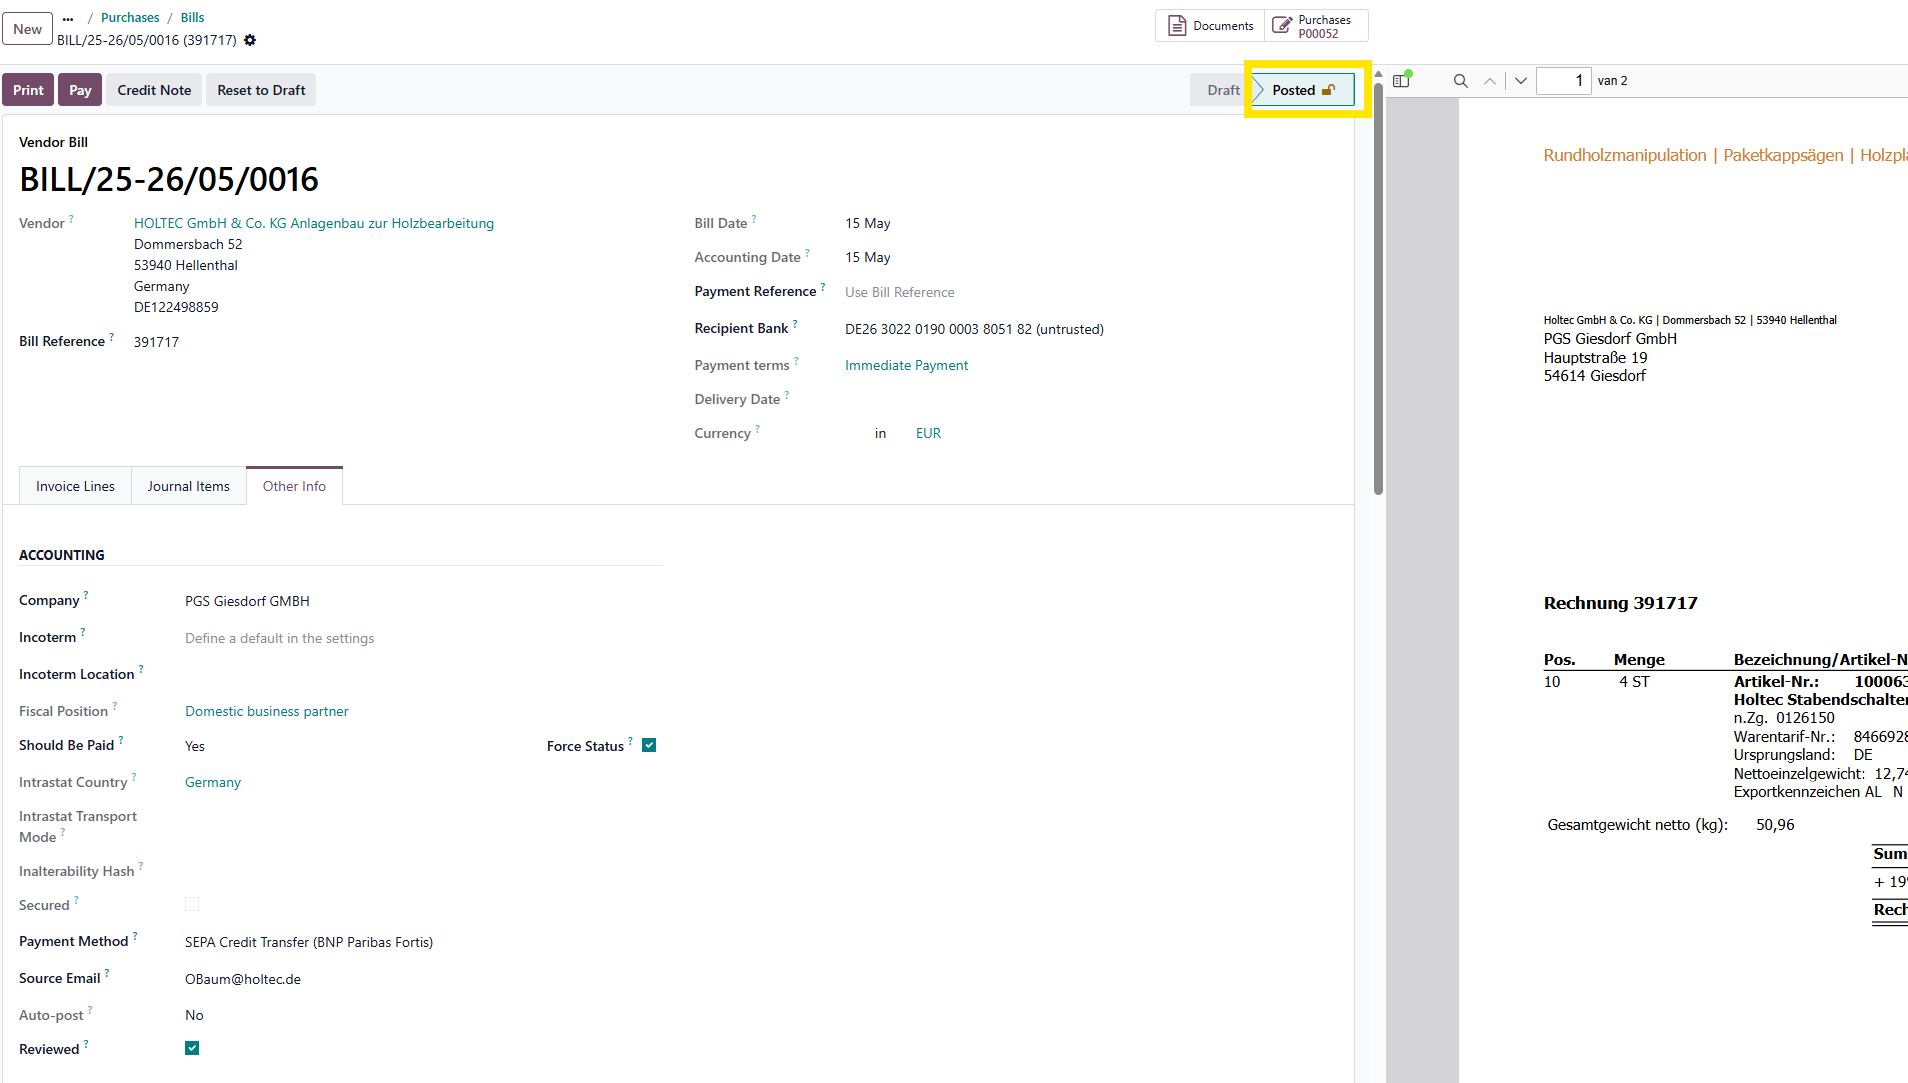
Last step is to 'Confirm' the bill.
The bill has now been 'Posted' and cannot be changed anymore.
The bill is now ready for payment.